A well-designed shower relies on the correct drain placement to manage water effectively and protect the entire bathroom. In modern Australian homes, walk-in designs are popular, but poor drainage planning often leads to leaks, water pooling and costly repairs. Understanding how a channel system works helps ensure your shower performs as intended and remains durable long term. Whether you are planning a renovation or starting fresh, getting the basics right makes all the difference.

Drain placement basics for walk-in showers
Correct drain placement controls how water moves across the shower floor and prevents damage outside the wet zone. In a walk-in shower, there is usually no raised step, so the drain is crucial for containing surface water. A channel layout is commonly positioned along the rear wall or directly behind a glass screen, helping guide water away from the entry.
This type of drain supports efficient water flow when paired with proper falls and waterproofing. It is especially effective in a wet room layout where open access is a priority. Many homeowners include this during a full bathroom renovation to improve both function and appearance.
Key placement considerations
- Shower size and orientation
- Entry point and shower screen location
- Existing pipe alignment
Thoughtful planning helps prevent water escaping the shower area and keeps the surrounding bathroom dry.

Linear drain vs point drain in a modern bathroom
Choosing between a linear drain and a point drain affects both layout and finish. A linear shower drain collects water along a narrow trench, while center drains draw water from a single outlet in the middle of the floor. In a modern bathroom, channel systems are often preferred for their clean lines and flexibility.
A strip drain or linear strip allows tiles to fall in one direction, simplifying the tiling process and improving water drainage. By contrast, a traditional center layout requires falls from multiple angles, increasing tile cuts and installation complexity.
Pros and cons
- Linear option: simpler slope, strong aesthetics, ideal for walk-in layouts
- Centre option: easier plumbing, more complex tile falls
During a renovation or new construction, selecting the right drainage systems early avoids layout compromises later.

Slope, tile falls and water flow control
Every shower depends on the correct slope towards the drain to function properly. Without the right gradient, surface water collects, leading to stains, mould, or a hidden leak. Channel systems usually require a single directional slope, making them easier to design and execute.
The tiled floor is set over a mortar bed or screed, shaped to ensure water flows smoothly towards the drain. This supports the waterproof membrane beneath and reduces long-term wear. Incorrect falls are one of the most common causes of shower failure.
Best practice tips
- Confirm slope before tiling begins
- Ensure tiles sit flush with the grate
- Test flow with surface water
Proper tile falls protect the structure and help prevent water escaping into dry areas.
Drain installation and watertight waterproofing
A successful drain installation begins well before tiles are laid. The pipe must be correctly positioned and set to the right height so the system can be plumb accurately. When installing a linear drain, the channel is fixed into a prepared trench and bonded using mortar.
A secure flange connection and continuous membrane application are essential for a watertight installation. This step protects the subfloor and ensures compliance with Australian standards. Many homeowners rely on professional waterproofing services to reduce risk.
Installation guide essentials
- Prepare substrate and falls
- Secure the channel and connect the pipe
- Apply membrane and pressure-test before tiling
Engaging a licensed plumber ensures the installation process is done correctly the first time.

Choosing the right grate size and finish
The grate plays both a functional and visual role in a shower. Tile-in designs allow the floor finish to continue uninterrupted, while exposed stainless steel options offer durability and easy cleaning. Common lengths such as 900mm or 1200mm suit most walk-in layouts.
A well-selected shower grate supports efficient water flow and contributes to the overall aesthetic. In a contemporary bathroom, slim profiles sit flush with the tiles and enhance the space.
What to look for
- Length suited to shower width
- Removable design for maintenance
- Slip-resistant surface
Balancing performance with aesthetics ensures a sleek and practical result.
Common mistakes in shower channel placement
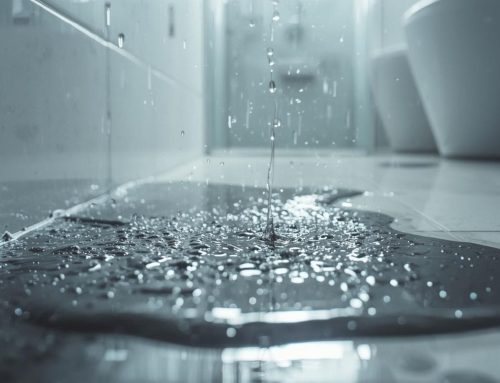
Incorrect placement is a leading cause of poor shower performance. Installing the drain too far from the entry can result in water pooling near the opening. Inadequate falls or rushed waterproofing also compromise the system over time.
Another issue is misalignment between the shower channel, tile layout and screen position. This makes it harder to control water and maintain a seamless finish.
Mistakes to avoid
- Insufficient slope or uneven gradient
- Skipping membrane testing
- Poor coordination between tiling and drain installation
Avoiding these errors helps achieve the best possible outcome and long-term reliability.

When this may not be the right fit
A channel system may not suit very small bathrooms where proper falls cannot be achieved. Existing plumbing locations can also limit options without major structural work. In these cases, alternative layouts may perform better.
How to judge if you need this now or later
If you notice recurring water pooling, grout deterioration, or moisture outside the shower, the drain layout may already be failing. Planning a bathroom renovation is the ideal time to upgrade, while cosmetic issues can often wait.
Where this connects to broader bathroom upgrades
Drain placement ties closely to tiling, waterproofing and layout decisions. It is often planned alongside professional shower and bath installation to ensure the entire space functions as one system.