A shower leak can start quietly, then turn into staining, odour, and damage that spreads beyond the shower area. This guide covers shower leak causes, the simplest checks to diagnose the issue, and what a sensible repair plan looks like for an Australian homeowner. A shower can fail at joints, finishes, or within connected services, so the goal is to find the real fault rather than guessing. If your shower may be leaking, start with the checks below and book a professional assessment if anything feels uncertain.

Signs your shower has a leak and why it matters
Your shower can show early signs before a visible leak appears. Spotting them fast reduces knock-on damage.
Start by looking for water stains on skirting boards, the ceiling below, or paint that bubbles near wet zones. A musty smell or mould at the base of the wall can also point to ongoing moisture. Check areas adjacent to the shower, because damp can travel and settle where you do not expect it.
Also pay attention to how the shower behaves during and after use. If the floor stays wet longer than usual or you see water seeping near corners, it may indicate gaps in the finish. Over time, repeated wetting can affect walls and floors, and in the worst cases contribute to structural damage.
Quick check: dry surfaces, run the shower for five minutes, then inspect edges and corners with a torch. If the damp line grows outside the wet zone, treat it as a leak and move to a more focused inspection rather than wiping and hoping it disappears.

Common causes of shower leaks in tile, grout and seals
Most shower leak issues start at joints, corners, and finishes. Tile and grout failures and worn seals are repeat offenders.
The common causes of shower leaks usually come down to wear and tear in the finishing layer. Tile movement, cracked tiles, and missing grout can open tiny pathways for water. When grout lines shrink or crumble, they stop acting as a barrier and instead invite moisture through.
Pay special attention to tile and grout junctions at corners, niches, and around penetrations. If tiles and grout can crack from movement or settlement, hairline gaps can form even when everything looks fine at a glance. Damaged tiles, loose edges, or a hollow sound under a tile can suggest a bond issue that needs proper repair rather than a surface patch.
Seals matter too. If the seal around a mixer plate or the base joint has split, water can track behind finishes. Old caulk around corners can lift and create a channel that encourages water to seep. In some cases a simple reseal restores the barrier, but only if the underlying waterproof layer has not been compromised.

Diagnose a shower leak with a step-by-step guide
A shower leak diagnosis works best when you test one area at a time. This step-by-step guide helps you narrow the origin.
The aim is to pinpoint the source of the leak and confirm the cause of the leak without tearing anything out first. Begin with a dry baseline, then test in stages so you can identify the source of a shower leak with confidence.
- Check fittings and hardware first: look at the mixer, taps, and any fixture trims for drips after shut-off. Confirm whether changes in water pressure affect the drip rate.
- Isolate splash versus escape: run the shower normally, then repeat while directing flow away from corners and joints. You are trying to see where water to escape the wet zone begins.
- Inspect hidden pathways: moisture can travel behind walls and show up later, so recheck 30 to 60 minutes after testing. This is how hidden leaks can mislead a quick inspection.
- Consider connected services: the plumbing system can leak at joins, and the hot water system can influence pressure changes that reveal weak points. Check visible pipework and listen for movement near water pipes and the water supply line if accessible.
If you find a damp edge at the same point every time, that spot is your root cause. If dampness appears in different places, it may be trapped behind finishes and spreading. Treat any uncertain reading as a potential leak and plan the next step carefully.
How to fix a leaking shower and plan the right repair
Once the leak is confirmed, match the repair to the failure point. Small surface issues need a different approach to deeper faults.
If you want to fix a leaking shower, start with the simplest safe actions, then escalate only when evidence supports it. When the leak is identified at a surface joint, cleaning and renewing the seal can be enough. If the problem sits within tile finishes, the repair may involve replacing local grout and re-sealing edges so the system can prevent water movement.
For a leaking shower repair that targets finishes, look for cracked or damaged tiles and assess whether the problem is limited to a small patch. Damaged tiles and grout around corners often let moisture in, especially where shower screens meet the wall. A failed joint at the shower tray can also let water creep out even when the tray itself looks intact.
Decision criterion: if moisture only appears during use and stays near a single joint, it can be a surface issue. If moisture appears hours later or outside the wet zone, treat it as deeper and plan for a more involved repair.
When repairing a leaking shower, avoid layering new sealant over grime. Proper preparation helps prevent future leaks, and it reduces the chance that small gaps will allow water to seep again.

When to call a plumber for professional solutions
Some leaks are surface-level, but others involve the plumbing system. A plumber can confirm what’s happening behind finishes.
If you suspect plumbing problems, do not rely on repeated patching. A fault in a line, fitting, or connection can keep feeding moisture even after you replace grout or sealant. This is where professional solutions matter, especially if the shower fixtures have been recently changed or the set-out was not plumb during installation.
Call a plumber if you notice water leaking when the shower is off, or if damp appears away from joints and corners. Those signs can indicate a supply-side issue or a slow leak behind finishes that needs proper testing. It can also contribute to leaks in nearby rooms, where staining appears far from the shower itself.
Keep an eye on repair costs when you are deciding what to do next. A quick fix that fails can double handling and increase disruption. If testing suggests extensive water damage, the sooner you confirm the real fault, the easier it is to limit the spread.
Waterproof checks after shower repair to avoid repeat issues
Waterproof details decide whether a repair lasts. A few checks help prevent a repeat shower leak.
After any shower repair, confirm that joins are continuous and corners are sealed cleanly. Look closely at changes of plane, where the wall meets the floor, and where fittings penetrate the wall. These are common pathways for water, especially if finishes have moved.
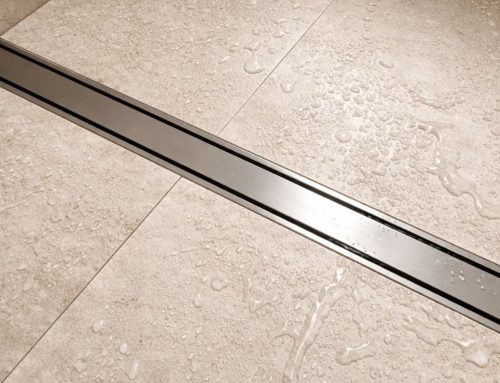
If the issue was in tile finishes, confirm the tile surface sheds water toward the waste rather than holding puddles. Splash is normal, but persistent pooling can lead to significant water penetration over time. Also inspect the bottom edges of shower screens and the shower door seal so water stays inside the wet zone.
If a surface fix fails quickly, assume the waterproof layer may be compromised and stop repeating the same repair. At that point, the right approach is to confirm the root cause of the leak and address it once, properly.

How to judge if you need repair now or later
Not every leak requires immediate demolition, but delay has a cost. Use simple decision rules to choose your next step.
When this may not be the right fit: if you are seeing damp in ceilings, soft flooring, or repeated staining outside the wet zone, a simple surface fix is unlikely to hold. Leaks without obvious puddles can still spread, so treat uncertain cases seriously.
How to judge if you need this now or later: if damp grows after every use, act now. If it only appears after heavy use and stays confined to a single joint, you may monitor briefly while you organise help. Recognising the signs early can reduce water damage and costly disruption, and it helps you avoid damage and costly repairs later.
Where this connects to next steps: once you confirm the likely failure point, decide whether a targeted repair is enough or whether you need broader work. If you are unsure, get the shower assessed before you commit to retiling or replacing fittings, so you are not treating symptoms instead of the culprits behind the problem.
Frequently Asked Questions
If you want help diagnosing your shower leak and choosing the best repair option, contact Eternity Bathrooms to arrange an assessment and get a clear plan for next steps.